Summarize in ChatGPT
Google Search Console (GSC) remains the most important free tool for anyone managing a website's search performance in 2026. Whether you run a small business blog, an enterprise e-commerce store, or manage dozens of client websites as an agency, GSC provides the direct line of communication between your site and Google's search engine.
Yet despite its power, many website owners and even experienced marketers underutilize Google Search Console. They check it occasionally when something goes wrong but miss the powerful insights available in daily performance monitoring.
This guide walks you through every step of setting up Google Search Console correctly in 2026 — from choosing the right property type to submitting your sitemap and interpreting your first Performance report.
What Is Google Search Console and Why Does It Matter?
Google Search Console is the most important free SEO tool available to any website owner. It shows you exactly what Google knows about your site — which keywords drive traffic, which pages have indexing errors, how your Core Web Vitals score, and which external sites link to you.
The platform covers every major SEO need. You can use Google Search Console for keyword research, technical SEO audits, backlink checking, sitemap submission, URL removal requests, indexing requests, and structured data validation.
In 2026, GSC has evolved significantly from its origins as Google Webmaster Tools. The interface is cleaner, the data is more granular, and integration with Google's broader ecosystem (Analytics 4, Looker Studio, Chrome DevTools) makes it more powerful than ever. Google has also added AI-powered insights that proactively surface opportunities and issues, making GSC accessible to beginners while remaining essential for advanced SEO professionals.
Step 1: Sign In and Create Your Property
To set up Google Search Console, go to search.google.com/search-console, sign in with a Google account, click Add Property, and verify ownership of your website.
Use the Google account associated with the website's Google Analytics or Google Tag Manager for the smoothest verification experience.
Choosing Between Domain and URL Prefix Properties
This is one of the most important decisions you'll make during setup, and getting it right saves significant headaches later.
Before adding your site to Google Search Console, you need to choose between two property types. A Domain Property provides the most comprehensive view of your site because it aggregates data across all protocols (HTTP and HTTPS), subdomains (www and non-www), and paths under your root domain. Domain properties require DNS verification through your domain registrar, which confirms you control the entire domain.
A URL Prefix property targets one exact version of a site, which is useful for isolating a subdomain or testing environment.
The bottom line: Use a Domain property for new setups, as it gives the most complete data. DNS verification is required for Domain properties.
Step 2: Verify Your Website Ownership
Google Search Console requires ownership verification before displaying data. This is the step where many beginners get stuck — but it's straightforward once you understand your options.
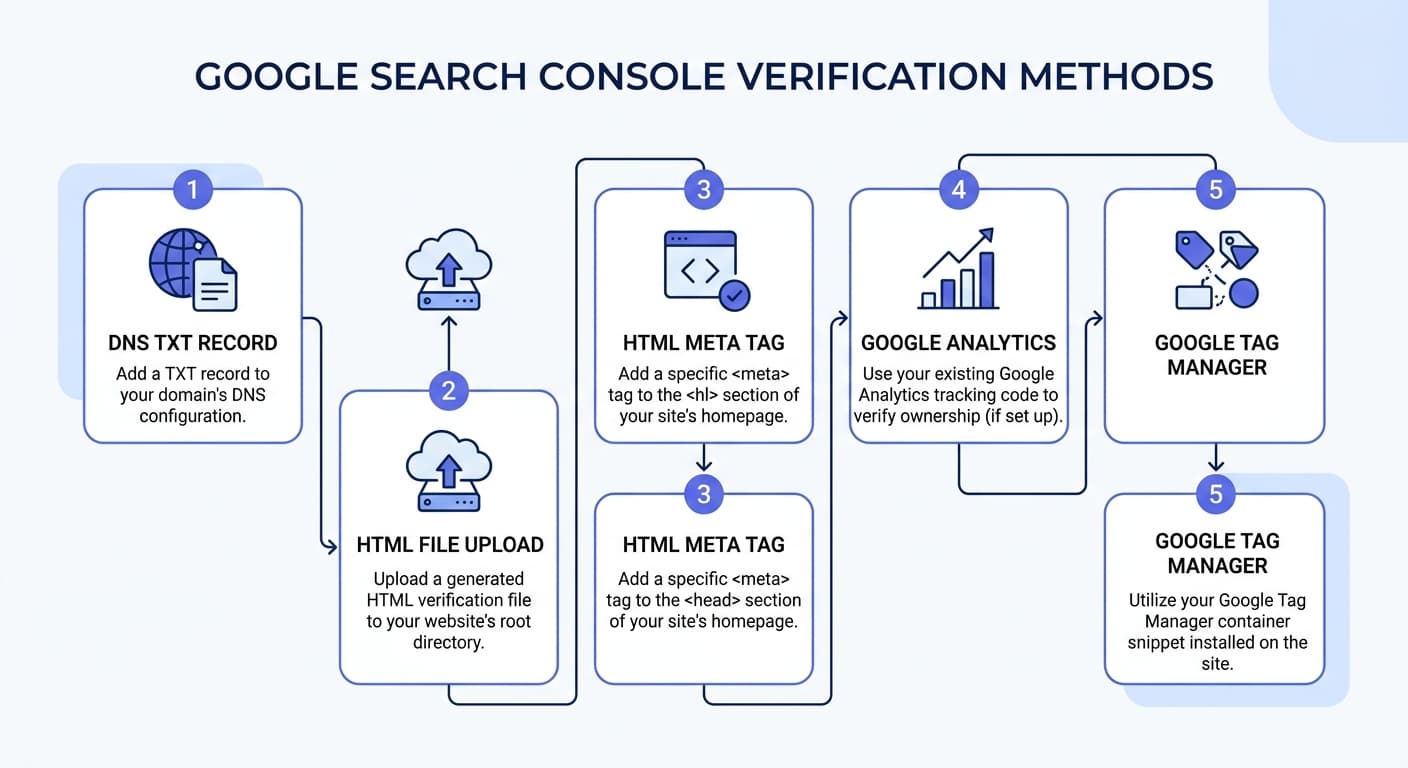
Verification methods include HTML file upload, HTML meta tag in your page head, Google Analytics auto-verify, Google Tag Manager, or DNS TXT record.
Here's a breakdown of each:
1. DNS TXT Record (Recommended for Domain Properties)
DNS TXT records provide the most permanent solution for verification. You add a TXT record via your domain registrar (e.g., GoDaddy, Namecheap, Cloudflare). Note that DNS propagation can take time — if it fails, retry later.
2. HTML Meta Tag
After adding a property, select HTML tag as the verification method. A custom meta code appears — copy and paste it exactly into the homepage <head>. If the tag disappears following a technical modification or redesign, verification may fail during subsequent checks by Google.
3. HTML File Upload
This method involves downloading a unique HTML file provided by Google and uploading it to your site's root directory. It's straightforward for those familiar with their server or CMS. This method works best for sites with direct access to their hosting files, offering a quick and reliable verification process.
Pro Tip: After uploading the HTML file, test the file URL in your browser before completing verification. If the file doesn't load, double-check the directory path and ensure you've uploaded it to the root folder.
4. Google Analytics
If you already have GA4 installed on your site, this is often the fastest option. If you use a website hosting platform like WordPress, Wix, or Squarespace, your platform might provide a special plugin or setting to verify your property easily, or even automatically.
5. Google Tag Manager
For those utilizing Google Tag Manager, verification can be done by connecting your Tag Manager account with Google Search Console. This method is particularly effective if you're already leveraging Tag Manager for tracking or marketing purposes. It's often recommended to clients managing multiple tags and scripts on their sites.
Backup Verification
You can add multiple verification methods in your property's verification settings page. You might want to add more than one verification method in case one of your existing verification methods fails — for example, if you verified using a Google Analytics tracking code, and someone changes a template on your website that omits the tag.
Permissions and User Roles
If you work with an SEO agency, a freelance developer, or an in-house marketing team, permissions matter more than you think. Go to Settings > Users and Permissions. A good rule of thumb: business owner and lead developer get Owner access. Agency partners get Full User. Interns, junior team members, and anyone who might accidentally click something irreversible get Restricted.
Step 3: Submit Your XML Sitemap
Once verified, submitting your sitemap is the single most impactful immediate action you can take.
The Sitemaps tool in Google Search Console is how you formally introduce your site's URL structure to Google. Submitting an XML sitemap accelerates crawl discovery, especially for large or recently launched sites. The tool also reports on how many URLs from your sitemap Google has discovered versus how many it has successfully indexed — a gap between these numbers is always worth investigating.
How to Submit Your Sitemap
In Google Search Console, navigate to the "Indexing" section in the left menu and click on "Sitemaps." You'll see a field to "Add a new sitemap." Enter the URL of your sitemap file. You usually don't need to type the whole URL — for example, it might show your domain and just ask for the path, so you would type sitemap.xml or sitemap_index.xml. Click "Submit." If it says "Success," Google was able to fetch your sitemap.
Common locations include /sitemap.xml, /sitemap_index.xml, or /post-sitemap.xml for WordPress sites using Yoast or Rank Math.
Advanced sitemap tips:
You can submit multiple sitemaps if your site is large or segmented — for example, a separate sitemap for blog posts versus products. Many sites have a sitemap index file that links to multiple sitemaps, and GSC handles that seamlessly.
Submitting a sitemap doesn't guarantee everything gets indexed, but it greatly helps Google prioritize crawling your content.
Sitemap submission is usually a one-time action — Google will re-crawl your sitemap periodically on its own.
If you don't have an XML sitemap yet, you can generate one instantly with our free XML Sitemap Generator.
Step 4: Wait for Data — and Know What to Expect
Patience is key after initial setup. The Google Search Console login process takes under 10 minutes for most sites, and data typically appears within 24 to 72 hours.
Here's a general timeline for each report: The Performance report updates with a 2–3 day delay. The URL Inspection tool shows the last indexed version but can test live URLs in real-time. The Index Coverage report updates approximately every few days as Google crawls your site. Core Web Vitals updates every 28 days based on rolling user data. The Links report updates as Google discovers new links, typically weekly to monthly.
Step 5: Master the Key GSC Reports
With your property verified and sitemap submitted, it's time to start extracting value. Here are the reports that matter most.
The Performance Report
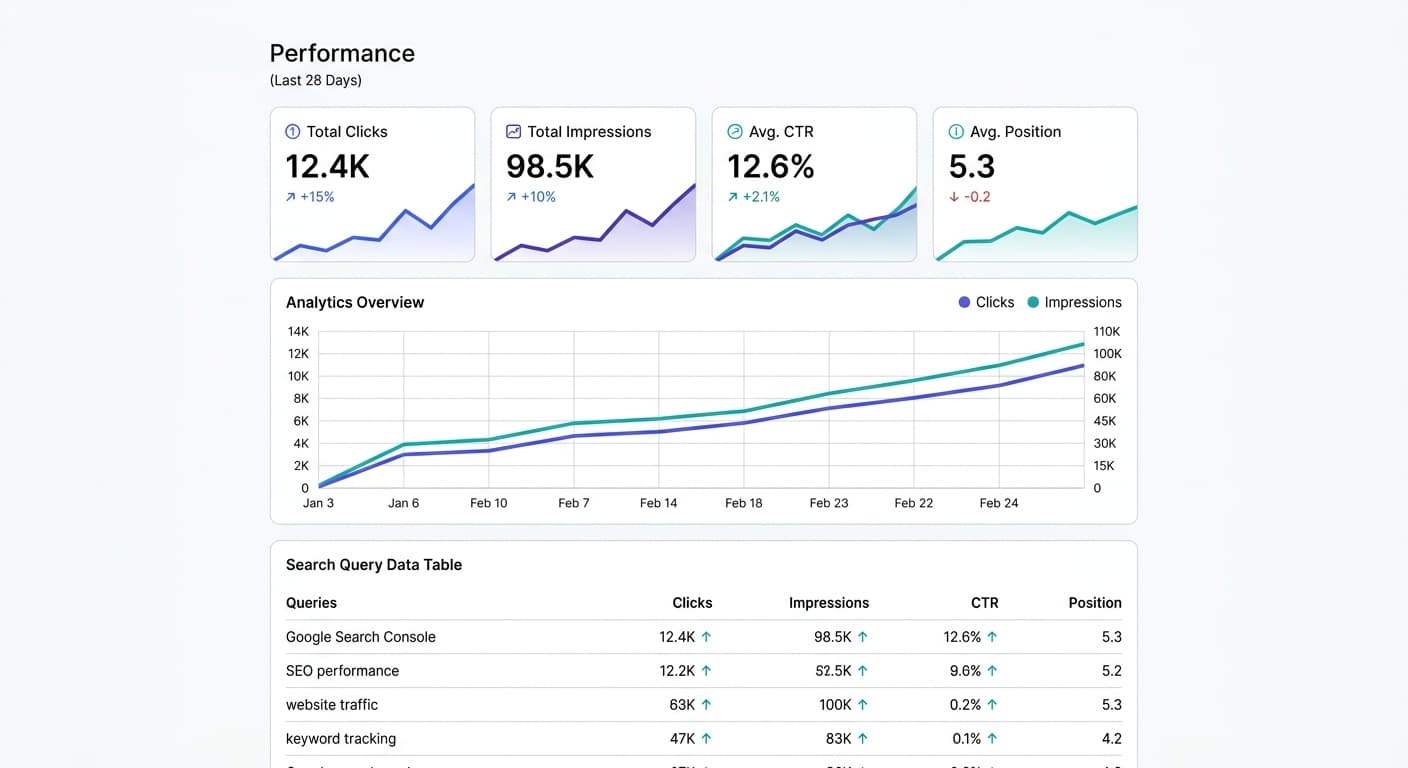
The Performance report is the most-used feature in GSC. It shows you exactly how your site appears in Google Search results and how users interact with your listings. Access it by clicking "Performance" then "Search results" in the left sidebar.
The four key metrics to track:
Clicks — actual organic traffic from Google
Impressions — how many times your URLs appeared in results
CTR (Click-Through Rate) — the percentage of impressions that turned into clicks
Average Position — your mean ranking position across all tracked queries
High impressions + low CTR means your page is showing, but not getting chosen. Improve title and snippet clarity, match intent, and make the "why click this" obvious.
Set the filters to "Greater than" and "10" to display where URLs rank on page two and higher — your goal is to find relevant keywords on page two (or "striking distance keywords") that your URL could target. With some SEO optimizations, your URL could move from page two to page one and start bringing in more traffic.
QuickSEO's Search Analytics dashboard shows clicks, impressions, CTR and position, the keywords and pages behind them, and the countries and devices they come from, for every website you add.
The Index Coverage / Pages Report
This section tells you how many of your pages Google has indexed. It also flags errors, pages that are excluded, and pages with warnings.
Watch for pages marked as "Discovered but not indexed," which means Google found them but has not processed them yet. Also look for redirect errors and 404 pages that are eating crawl budget. If you submitted a sitemap, you'll see exactly how many URLs from it are indexed versus how many are not — that gap is worth investigating.
Core Web Vitals
The Google Search Console Core Web Vitals report is the only source of real-user performance data that directly maps to Google's page experience ranking factor — making it an indispensable part of every technical SEO audit.
The three metrics to monitor:
LCP (Largest Contentful Paint): Measures loading performance by tracking how long it takes for the largest content element in the viewport to become visible — typically a hero image, video, or large block of text.
INP (Interaction to Next Paint): Measures responsiveness by assessing how quickly your page responds to user interactions throughout their entire visit. INP replaced First Input Delay (FID) as a Core Web Vital in 2024.
CLS (Cumulative Layout Shift): Measures visual stability by quantifying how much elements on your page shift around during loading.
The Links Report
From internal to external backlinks, you can use the Links report to view your top-linked pages (by both internal and external links). This is invaluable for understanding your site's link authority structure and spotting pages that may need more internal links pointing to them.
Common Setup Mistakes to Avoid
Even experienced SEOs make mistakes during GSC setup. Here are the most critical ones to watch out for:
Verifying the wrong URL version. Validating the wrong version of the site (HTTP, www, incorrect subdomain) is a common mistake that prevents you from collecting meaningful data.
Removing verification tags during site updates. Validation remains active as long as the technical proof is kept in place. Methods based on a file, tag, or meta element are more sensitive to change — removing them during a deployment, changing a theme, or a technical migration can result in lost access.
Only using one verification method. Always set up a backup — as Google's official documentation states, having multiple verification methods protects your access if one fails.
Ignoring the sitemap gap. If Google discovers 500 URLs in your sitemap but only indexes 300, something is wrong. Check for duplicate content, thin content, or crawl budget issues.
Not setting up user permissions correctly. GSC isn't just reporting — it can affect indexation workflows. Owners can view all data, change settings, submit sitemaps, request indexing, and manage users. Giving the wrong people owner-level access can cause serious problems.
Connecting GSC to GA4 and Looker Studio
Search Console explains what happens on Google's results pages: queries, impressions, clicks, CTR, positions, and technical signals linked to crawling and indexing. It therefore sits upstream of the visit itself. Google Analytics is best suited to analysing user behaviour, conversions, customer journeys, attribution, and overall site performance post-click. Understanding the difference between Search Console and Google Analytics is fundamental, as it explains why discrepancies are structural rather than accidental.
For WordPress users, the free "Site Kit by Google" plugin from the WordPress plugin directory connects both Google Search Console and Google Analytics in one place, with a guided setup wizard. This is the easiest and most reliable option for WordPress users in 2026.
For agencies and advanced users, you can automate your reporting by connecting GSC to Looker Studio and building custom performance dashboards.
Beyond GSC: AI Search Surfaces
Setting up Google Search Console is a critical first step — but in 2026, Google is no longer the only search surface that matters. AI chatbots like ChatGPT, Claude, Gemini, and Perplexity are now answering millions of queries per day, and GSC tells you nothing about how visible your brand is in those responses.
Google Search Console Setup Checklist
Here's a quick-reference checklist to make sure you've covered every step:
Sign in to GSC at search.google.com/search-console
Add a Domain property (recommended) or URL Prefix property
Complete primary verification (DNS TXT record preferred)
Add a backup verification method
Set up correct user permissions (Owner / Full User / Restricted)
Submit your XML sitemap
Check the Index Coverage report for crawl errors
Review the Performance report after 3+ days of data
Connect GSC to GA4 for post-click behaviour data
Monitor Core Web Vitals for page experience signals
Set up AI visibility tracking alongside GSC for full-funnel search coverage
QuickSEO is a free Google Search Console dashboard for all your websites. Connect Search Console, pick the properties you want, and see clicks, impressions, CTR and average position for every site on one screen, each compared with the previous period, with the keywords and pages behind the numbers. Connect Search Console for free →
Conclusion
Setting up Google Search Console is straightforward, but getting it right from the start avoids data gaps and verification headaches later. By choosing the right property type, using a robust verification method, submitting your sitemap correctly, and learning to read the key reports, you'll have a powerful, free SEO command centre that gives you direct insight into how Google sees your site.
But remember: GSC is the starting point, not the finish line. The real SEO wins come from acting on what the data tells you — finding keyword gaps, fixing indexing errors, improving CTR on high-impression pages, and creating content that ranks.
QuickSEO shows clicks, impressions, keywords and pages for every website you manage, compared with the period before.
- Unlimited websites on the free plan
- No credit card needed
Try it yourself
Related free tools
Free SEO tools related to the topics covered in this article.
Keep reading
Related posts
More articles on the same topics, prioritized by shared tags and keyword overlap.